In this article we’re going to create a queue in Amazon Simple Queue Service (SQS) using an AWS Stack template.
Amazon SQS and Spring Series
This article is part of a series:
- Create a queue in Amazon SQS
- Set up a Spring Boot app with Amazon SQS
- Send messages to an Amazon SQS queue using Spring Boot
- Receive messages from an Amazon SQS queue using Spring Boot
What is a message queue
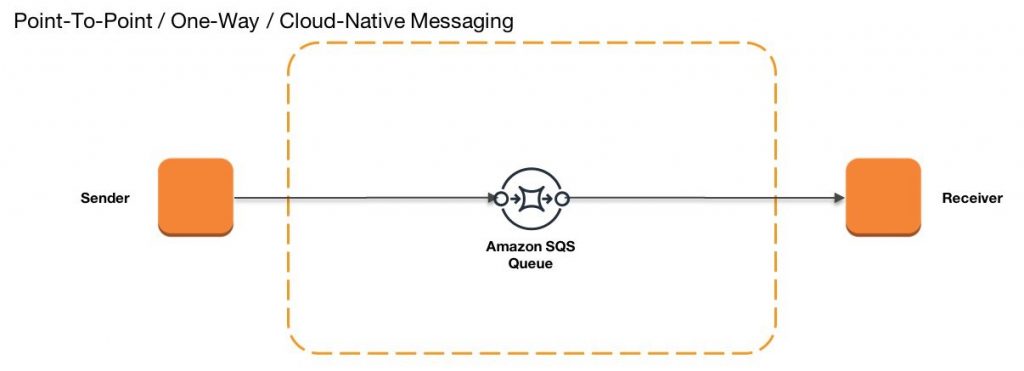
Message queues allow different parts of a system to communicate and process operations asynchronously. A producer sends a message to the queue. The message is stored in the queue until a consumer retrieves the message. The messages are usually small, and can be things like requests, replies, error messages, or just plain information. Many producers and consumers can use the queue, but each message is processed only once by a single consumer (also called one-to-one or point-to-point communication). Message queues are useful to decouple producers and consumers applications and batch work, among others.
Create an AWS account
Amazon SQS is a hosted message queuing service, which we’ll be using for creating our queue. You need an AWS account; if you don’t have one, you can create one for free. For Amazon SQS, a free account will allow up to 1 million requests per month (after which you’ll be charged).
If you’re creating a free account, I recommend reading the AWS Free Tier FAQ and also creating a cost budget, so you’re alerted if charges exceed your budget (you can set up a budget as low as $1).
Create an AWS stack
We’re going to to use AWS CloudFormation and a template to create an AWS stack. An AWS stack is just a collection of related resources that can be provisioned and managed as a unit. We’re using a stack for our project because it provides logical name resolution (you can use the queue name you defined in the AWS stack throughout your application, instead of having to use the physical resource name assigned by AWS). It also allows us to delete all the resources associated with the stack in one step, which comes in handy if you’re building an app just for testing purposes.
Amazon SQS provides two types of queues, Standard and FIFO (see this table for a comparison). We’re going to create a Standard queue in this article.
The stack will contain:
- An Amazon SQS standard queue
- A user (IAM user) with full-access to Amazon SQS and read-only access to AWS CloudFormation
- An access key for the user (used by the Spring Boot app to connect to AWS)
Follow these steps to create an AWS stack from a template:
- Open the AWS Management Console.
- Select the region where you want to create your resources, e.g. US East (Ohio).
- Under AWS Services, look for CloudFormation.
- Click Create stack.
- Accept the default Template is ready and select to Upload a template file.
- Download the template file to your computer by clicking Download ZIP in the GitHub Gist page that opens.
- Then in AWS, Choose file > choose the template file you just downloaded. Click Next.
- Enter a stack name, e.g. Spring-Sqs.
- Click Next until you get to the Review page. Scroll to the bottom and put a checkmark to acknowledge that IAM resources might be created. Click Create stack.
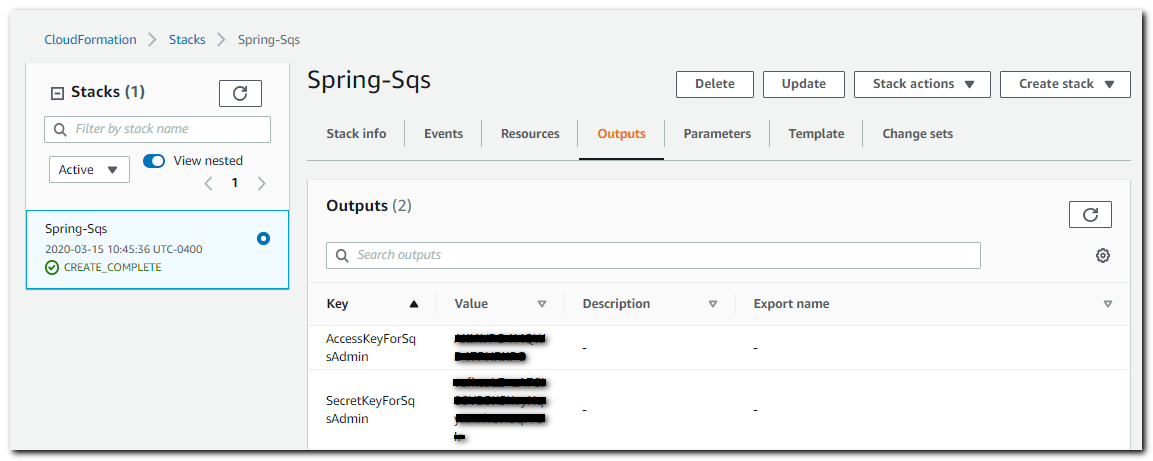
- You should see the new stack with a status of CREATE_IN_PROGRESS. It might take a couple of minutes until AWS creates the resources and the status changes to CREATE_COMPLETE.

- Click on the Outputs tab and save the access key and secret key for the SqsAdmin user. We’ll need these values in the next part of the tutorial where we set up a Spring Boot app that can connect to Amazon SQS.
View resources in AWS
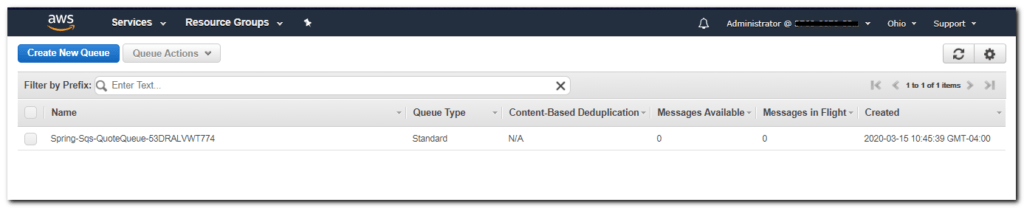
To view the queue you just created, under AWS services, search for Simple Queue Service.
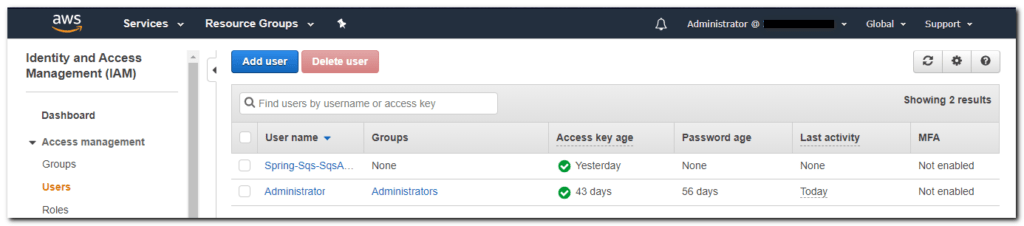
To view the user, under AWS services, search for IAM. Click Users in the left navigation pane.