Previously you had to install and enable .NET Analyzers if you wanted to use it. Now, when you create a new project, it’s already installed and enabled by default (but you may want to change its settings). There are two main scenarios:
- .NET Analyzers is already installed and you want to change its settings.
- You want to install .NET Analyzers in an existing project.
If .NET Analyzers is already installed
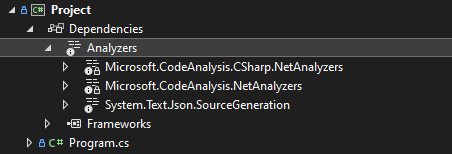
When you create a new project targeting the latest .NET version, .NET Analyzers is automatically added to your project. You can see this in the Project > Dependencies > Analyzers tab in Visual Studio:
You can toggle .NET Analyzers off/on with the EnableNETAnalyzers setting in .csproj (or in a props file). You can also set the AnalysisMode and AnalysisLevel. Here’s an example:
<PropertyGroup>
	<OutputType>Exe</OutputType>
	<TargetFramework>net6.0</TargetFramework>
	<EnableNETAnalyzers>true</EnableNETAnalyzers>
	<AnalysisMode>AllEnabledByDefault</AnalysisMode>
	<AnalysisLevel>latest</AnalysisLevel>
</PropertyGroup>
Code language: HTML, XML (xml)
Note: You may be able to control these settings in the Code Analysis tab in Visual Studio. I couldn’t get that working. Putting the settings in csproj made it work, so I kept using this approach.
Furthermore, I recommend starting with AnalysisMode=AllEnabledByDefault. Then as you run into analysis warnings you don’t want, you can disable them individually.
Note: You can use the analyzer from the .NET SDK even if your project isn’t targeting the latest .NET version.
Installing .NET Analyzers
If your project doesn’t already have .NET Analyzers installed, you can get it by installing the package:
Install-Package Microsoft.CodeAnalysis.NetAnalyzersCode language: PowerShell (powershell)Then add the following settings to the .csproj file to enable and configure it:
<PropertyGroup>
	<OutputType>Exe</OutputType>
	<TargetFramework>netcoreapp3.1</TargetFramework>
	<EnableNETAnalyzers>true</EnableNETAnalyzers>
	<AnalysisMode>AllEnabledByDefault</AnalysisMode>
	<AnalysisLevel>latest</AnalysisLevel>
</PropertyGroup>
Code language: HTML, XML (xml)
Check if code analysis works
After enabling .NET Analyzers, you can check if it’s working by intentionally adding code that will trigger a code analysis warning, such as the following enum:
public enum Animals
{
	Dog = 1,
	Cat = 2
}
Code language: C# (cs)
Read more about another code analysis warning – CA2208: Instantiate argument exceptions correctly.
If in doubt, rebuild the project. If everything is working as intended, then you should see the following code analysis warning:
CA1008 Add a member to Animals that has a value of zero with a suggested name of ‘None’
With this in my project file, I get the below warning. The Configuration Manager only has disabled controls for any project with such a fragment. This applies also to my console application with OutputType set to Exe.
Library
net461
AllEnabledByDefault
latest
There is no project configuration matching the active solution configuration. Open the Configuration Manager and fix configuration mapping for this project.
The error you’re getting is caused by pasting this into a non-SDK-style project file:
<TargetFramework>net461</TargetFramework>To get rid of the error, remove that line (and then unload/reload the project). However, this error points to a bigger issue. The instructions in this article are for a SDK-style project file, and you’re using a non-SDK-style project file. So if you want to use this approach, I’d suggest converting your project file to the SDK-style.
How to get report of NET analyzers using errorlog for complete solution in single file
I believe you’re referring to the ErrorLog property. You can put this in .csproj:
<ErrorLog>errorsAndWarnings.json,version=2.1</ErrorLog>
And it’ll output the compiler errors and analysis warnings into a file called errorsAndWarnings.json.
Refer to the Microsoft document about this for details: https://learn.microsoft.com/en-us/dotnet/csharp/language-reference/compiler-options/errors-warnings#errorlog