It’s important to add .gitignore to your git repository. This tells git which files in your source directory to not track. Without this, you end up pushing lots of unnecessary files to your repository – such as build output files.
The simplest way to add .gitignore is by using Visual Studio. This initializes it with a template relevant to .NET projects. If you’re using an older version of Visual Studio that doesn’t have git integration, you can add .gitignore on the server-side (ex: GitHub) or manually.
In this article, I’ll show how to add .gitignore in Visual Studio, how to ignore more files, and show other approaches for adding .gitignore.
Table of Contents
Add .gitignore in Visual Studio
In the Visual Studio, click Git > Settings.
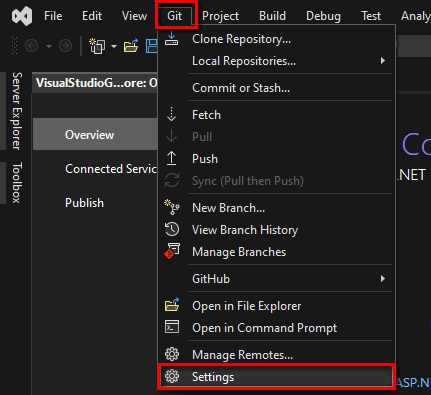
This opens the Options window.
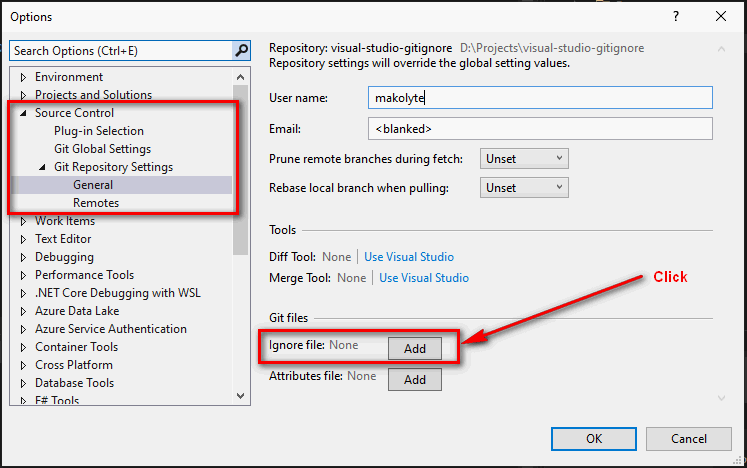
- Navigate to Source Control > Git Repository Settings.
- In the Git files section, click Add (next to Ignore file).
It’ll add the .gitignore file to the repository root directory. The UI will change to indicate that the .gitignore now exists.
Click OK.
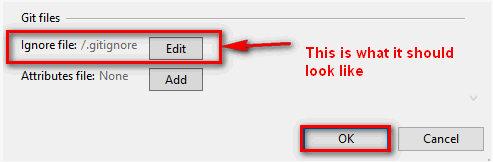
Note: You can click Edit to view the file and modify it.
Visual Studio stages .gitignore for you, so you just need to commit/push it.
Ignore more files and directories
The default .gitignore template in Visual Studio is good, but as you’re developing and adding files, you may need to ignore more files and directories.
You can ignore specific files, file extensions, and directories.
Ignore a file through the UI
In the Git Changes tab, right-click the file to ignore, and choose Ignore this local item.

This updates .gitignore and stages it (so you just need to commit and push it).
Edit .gitignore manually
.gitignore is just a text file and you can edit it manually. It’s located in the repository root directory.
You can open it through the UI.
- Open the Options window again (Git > Settings).
- Go to Source Control > Git Repository.
- Click Edit (next to Ignore file).
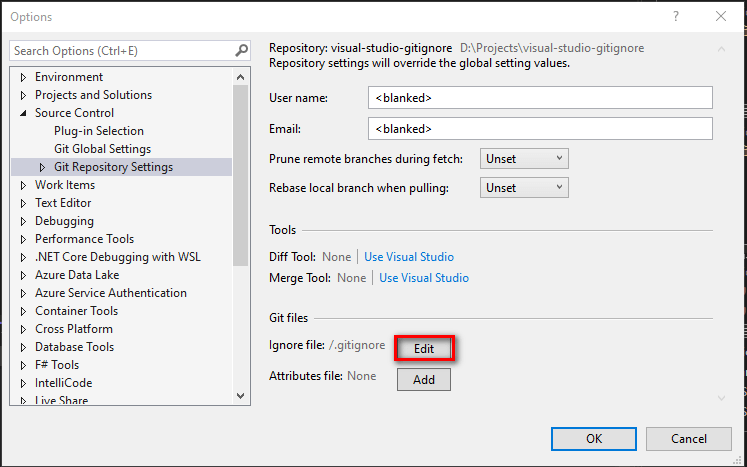
This opens .gitignore in the IDE.
Let’s say you want to ignore appsettings.Development.json:
# My files to ignore
appsettings.Development.json
Code language: plaintext (plaintext)Then save the file and commit/push it.
Add .gitignore on the server-side (GitHub)
When you’re creating a git repository in GitHub, you can add .gitignore and apply the VisualStudio template:

Note: You can add it to an existing repository too, but definitely try to add .gitignore as early as possible.
Some git backend servers don’t have a good default .gitignore. In that scenario, you’ll probably want to modify it by adding a good template. I’ll give a link to a good template in the next section.
Adding .gitignore manually
You don’t need to use the UI to add .gitignore. You can add it manually by adding an empty .gitignore file to your repository root directory. Your directory might look something like this:
.git
.vs
src
tests
.gitignore
Code language: plaintext (plaintext)If you’re going to add .gitignore manually, I suggest initializing it with the following template: https://github.com/github/gitignore/blob/main/VisualStudio.gitignore.
Then commit/push it.